Working on a command palette with XState
I work on zoo-modeling-app most days now, which has been fulfilling for many reasons, one of which is that each of us on the team has these pet causes we're championing while we build the app. Kurt's is a code-driven approach to CAD editing, where all of the point-and-click editing is simply editing a text file underneath (I actually wrote about this with him on CadHub back in the day), and so far mine has been this:
every action that is currently possible for a user should also be easy for developers to make available in a command palette.
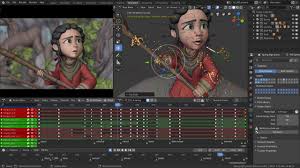
Here's a little demo of what I've got in the command palette at the moment:
Command + K
Maggie Appleton has a great write-up on "Command K Bars" as they're sometimes called, and I think that UX pattern is both excellently fitting for hardware design and Kurt's code-first mission for the following reasons:
1. Faster and easier to find than buttons
Command palettes combine search and action in a tight, fast interface. One of the biggest learning curves in CAD software is just the sheer number of actions you can perform at any given time, and where in the UI the trigger that action may be. Command palettes are an excellent way for new users to bail out if they can't find a button.
It would be really helpful in an app with as many buttons as, say, Blender, to know you could always hit a keyboard shortcut to find and do the thing you want to.
2. Requires a good state architecture
The prerequisites for a command palette, especially being able to know what next actions are valid for the user based on their current state, are great standards to hold yourself accountable to while architecting the rest of the business logic. And they enable features that I haven't seen in other CAD applications, such as disabling or hiding buttons that aren't relevant in the current context.
3. Provides an input method between code and UI
Command palettes provide a third way between GUI editing and code editing. Highly-skilled users of Modeling App will be able to fluidly flip between point-and-click, text, and commands, and will develop preferences for each when completing different modeling tasks.
4. They're consistent and learnable
Command palettes provide a more consistent UI pattern than popup dialogs commonly found in CAD applications. Consider this Extrude popup from Onshape:
What a dense piece of UI they've built here! It really is impressive. But it uses so many layout and input patterns in one little region of the screen: tabs, sliders, checkboxes, checkboxes that look like arrows, disclosures, text inputs, select inputs, and probably more. Each new UI pattern is a learning tax on your users.
The designers had their work cut out for them to solve this layout in a way that allowed users to quickly input only what they need for an extrusion while slowly being able to learn what optional bells and whistles are available. They chose to go with a two-tiered set of tabs followed by all the relevant inputs for the Extrude command, but they (correctly) chose a different layout for Loft, and each other modeling command. Each new UI layout is also a learning tax on your users.
With a command palette as your centerpiece, inputs have a consistent layout and allow for progressively-revealed complexity. When we start to have more optional parameters, I'll be implementing them in the review step of the command bar like this:

XState
This state orchestration library allows developers to model their application state as a finite state chart, or state machine[1]. To progress between states in a machine, developers wire up parts of the app to fire events to the state machine, and if a valid event is received, it advances along the state chart to the next state.
I advocated for us switching from Zustand for our state management into XState really for one feature in the beginning: state.nextEvents. Given your state machine's current state, XState can tell you what all the next valid events that could be fired are. This was the basis of a cool little demo command bar that David and Farzad from Stately whipped up for a YouTube stream last year, which was my inspiration for our command bar.
How our command bar works
Our command bar is itself a state machine, so I can actually show you a diagram of its business logic[2]:
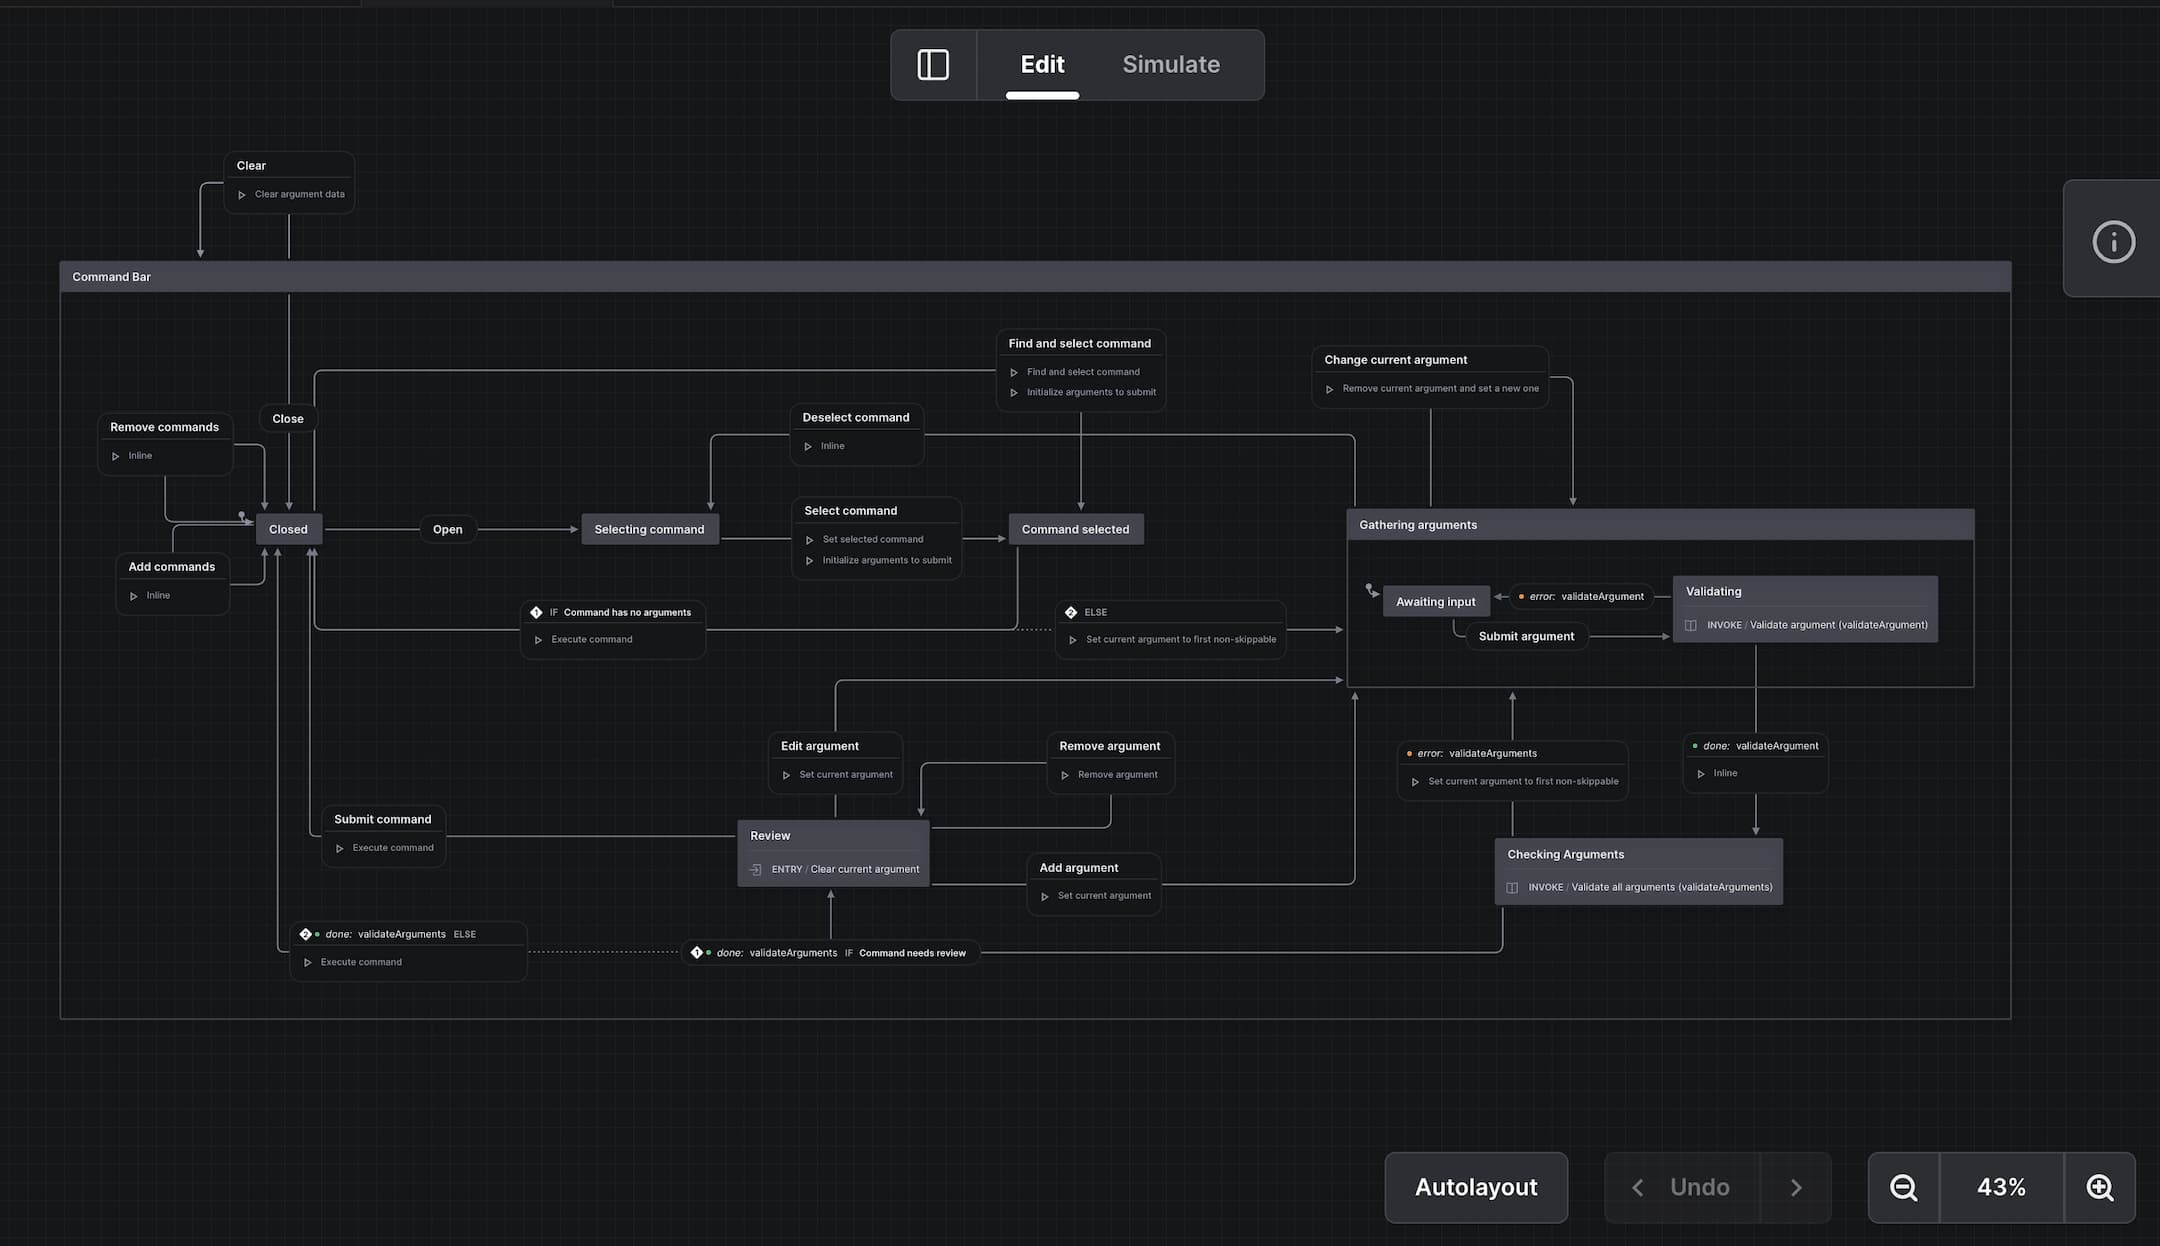
We have several XState machines for various parts of the app: modeling state, settings state, auth state, and so on. In our React app these are made available for user around the app via React contexts. The outermost of these machines is the commandBarMachine. Each of the other state machines create a new list of available commands when their state changes, based on their state.nextEvents and their command configurations, and add them to the command palette using its "Add commands" event.
Firing a state machine event consists of a type, but it can also include a data payload as well. For example, firing the Extrude modeling event must include both a face selection and an extrusion distance. In the command palette, the keys of that data payload are presented as a series of command arguments, which show different user interfaces based on their data type. The valid input types for command bar arguments are currently:
options- renders a searchable comboboxstring- renders a text inputkcl- renders a smarter text input that checks that the text inside it is a valid KCL expression, and allows an optionally allows the user to save the expression as its own constantselection- makes the command palette not dismiss when clicked off of, and listens for changes to the user's selection via clicking the 3D sceneboolean- renders a little searchable combobox with options for On and Off
A state machine has to opt into having events that appear in the command palette as commands. This takes the form of a strongly-typed command config for that state machine, which is where developers[3] provide details about the type of UI the command bar should present to the user. Here's our modeling command config:
import { Models } from "@kittycad/lib";
import { CommandSetConfig, KclCommandValue } from "lib/commandTypes";
import { Selections } from "lib/selections";
import { modelingMachine } from "machines/modelingMachine";

type OutputFormat = Models["OutputFormat_type"];
type OutputTypeKey = OutputFormat["type"];
type ExtractStorageTypes<T> = T extends { storage: infer U } ? U : never;
type StorageUnion = ExtractStorageTypes<OutputFormat>;

/**
 * This type allows us to strongly type the
 * config for each argument, including the functions
 * for validation, defaultValue, and options
 */
export type ModelingCommandSchema = {
  "Enter sketch": {};
  Export: {
    type: OutputTypeKey;
    storage?: StorageUnion;
  };
  Extrude: {
    selection: Selections;
    distance: KclCommandValue;
  };
};

/**
 * We pass in the type of the state machine as well
 * so that we can get type checking on the event names
 */
export const modelingMachineConfig: CommandSetConfig<
  typeof modelingMachine,
  ModelingCommandSchema
> = {
  "Enter sketch": {
    description: "Enter sketch mode.",
    icon: "sketch",
  },
  Export: {
    description: "Export the current model.",
    icon: "exportFile",
    needsReview: true,
    args: {
      type: {
        inputType: "options",
        defaultValue: "gltf",
        required: true,
        options: [
          { name: "gLTF", isCurrent: true, value: "gltf" },
          { name: "OBJ", isCurrent: false, value: "obj" },
          { name: "STL", isCurrent: false, value: "stl" },
          { name: "STEP", isCurrent: false, value: "step" },
          { name: "PLY", isCurrent: false, value: "ply" },
        ],
      },
      storage: {
        inputType: "options",
        defaultValue: (c) => {
          switch (c.argumentsToSubmit.type) {
            case "gltf":
              return "embedded";
            case "stl":
              return "ascii";
            case "ply":
              return "ascii";
            default:
              return undefined;
          }
        },
        skip: true,
        required: (commandContext) =>
          ["gltf", "stl", "ply"].includes(
            commandContext.argumentsToSubmit.type as string,
          ),
        options: (commandContext) => {
          const type = commandContext.argumentsToSubmit.type as
            | OutputTypeKey
            | undefined;

          switch (type) {
            case "gltf":
              return [
                { name: "embedded", isCurrent: true, value: "embedded" },
                { name: "binary", isCurrent: false, value: "binary" },
                { name: "standard", isCurrent: false, value: "standard" },
              ];
            case "stl":
              return [
                { name: "binary", isCurrent: false, value: "binary" },
                { name: "ascii", isCurrent: true, value: "ascii" },
              ];
            case "ply":
              return [
                { name: "ascii", isCurrent: true, value: "ascii" },
                {
                  name: "binary_big_endian",
                  isCurrent: false,
                  value: "binary_big_endian",
                },
                {
                  name: "binary_little_endian",
                  isCurrent: false,
                  value: "binary_little_endian",
                },
              ];
            default:
              return [];
          }
        },
      },
    },
  },
  Extrude: {
    description: "Pull a sketch into 3D along its normal or perpendicular.",
    icon: "extrude",
    needsReview: true,
    args: {
      selection: {
        inputType: "selection",
        selectionTypes: ["extrude-wall", "start-cap", "end-cap"],
        multiple: false, // TODO: multiple selection
        required: true,
        skip: true,
      },
      distance: {
        inputType: "kcl",
        defaultValue: "5 + 7",
        required: true,
      },
    },
  },
};
As you can see, some commands like "Enter sketch" take no arguments and so can be fast-tracked through the commandBarMachine when selected, just firing the event and closing the command bar. Others like "Extrude" have a first argument that may be able to be skipped if a value is available another way, like we have already selected a single face, so it is configured with skip: true. And the "Export" command shows how command arguments may be only needed based on the input of earlier ones. The storage argument is not required if the user selected a STEP or OBJ export, and the available options for that argument also change depending on the chosen type.
After an argument is submitted all the arguments are validated, and if any fails it is made the current argument, showing the input UI. This allows us to advance through the required arguments one by one, and frees the command bar to allow for out-of-order editing and backtracking like you saw in my video.
Lastly, if a command is configured as needsReview, a confirmation step is shown with all of the inputs can be reviewed, and if there is an issue they can be returned to by clicking on their buttons, tapping Backspace, or Alt + <argument-number>. Or the user can hit Enter to submit and close the palette.
It all rhymes
As I've built out the command palette more and more, I've enjoyed the ways it has rhymed with existing patterns like the popup dialogs of current CAD software. At the end of the day, a command palette is not too different from a dialog that happens to show the user one input at a time.
But I believe that by architecting our app in a way that centers searchable, scannable commands we are preparing Modeling App to be the easiest-to-learn CAD tool, even as its capabilities balloon rapidly in the coming months. And by setting the high bar for ourselves to have predictable next states always available as commands, we have reached for a state orchestration tool that might have otherwise seemed too complex at this early point, and have set ourselves on a good foundation with XState.
I may end up just reinventing the popup dialog with this palette, but I think I'm nudging some things into the right direction as I go.